Archive | October, 2010

Firetruck Birthday Party

25 Oct

Last week was my son’s 5th birthday.  He really wanted a firetruck themed party so we did our best… With a baby arriving any day we decide to host the party at a local art studio so that our house would not end up a mess.  It was the perfect venue for our art inspired, firetruck themed, 5th birthday party…  Here are some pictures:

These are the cupcakes I made for all of the kids.  I made the firetrucks out of candy melts… Here is the scoop…

1.  Either draw or print off the outline of a firetruck (or what ever shape you want to use).  I copied six to a page.  Tape this paper to a cookie sheet.  Place a piece of wax paper over the image you want to use…

2.  Here is the tricky part… You are essentially decorating upside down so you really have to think about what to draw first.  I chose to do the “white” candy melts first.  I melted them in a squeeze bottle, but you could do a ziplock bag or pastry bag too…  Once you have the candy melted draw anything you want in that color.  I drew (freehand) the ladder, tires and light.

3.  Once you are done with your “base” color. You’ll need to think about what other color you want just a bit of…  Obviously this was black for me.  I drew the black window and wheels…

4.  The next thing I did was melt the red.  Since this is the “all over” color you will want to draw the outline of the firetruck and then cover all the other colors and drawings you made with the red.  This is the only way to get your project to “stick” together.  It will look funny, just remember this is the back!

5.  Pop them in the freezer for a little bit…  Take them out and carefully peel them off…  VIOLA!  It’s a pretty fun “surprise” to see what they look like on the opposite side.  I was hoping they would turn out like I imagined them in my head and they did!

At the party the guests all got fire helmets and fire badges…

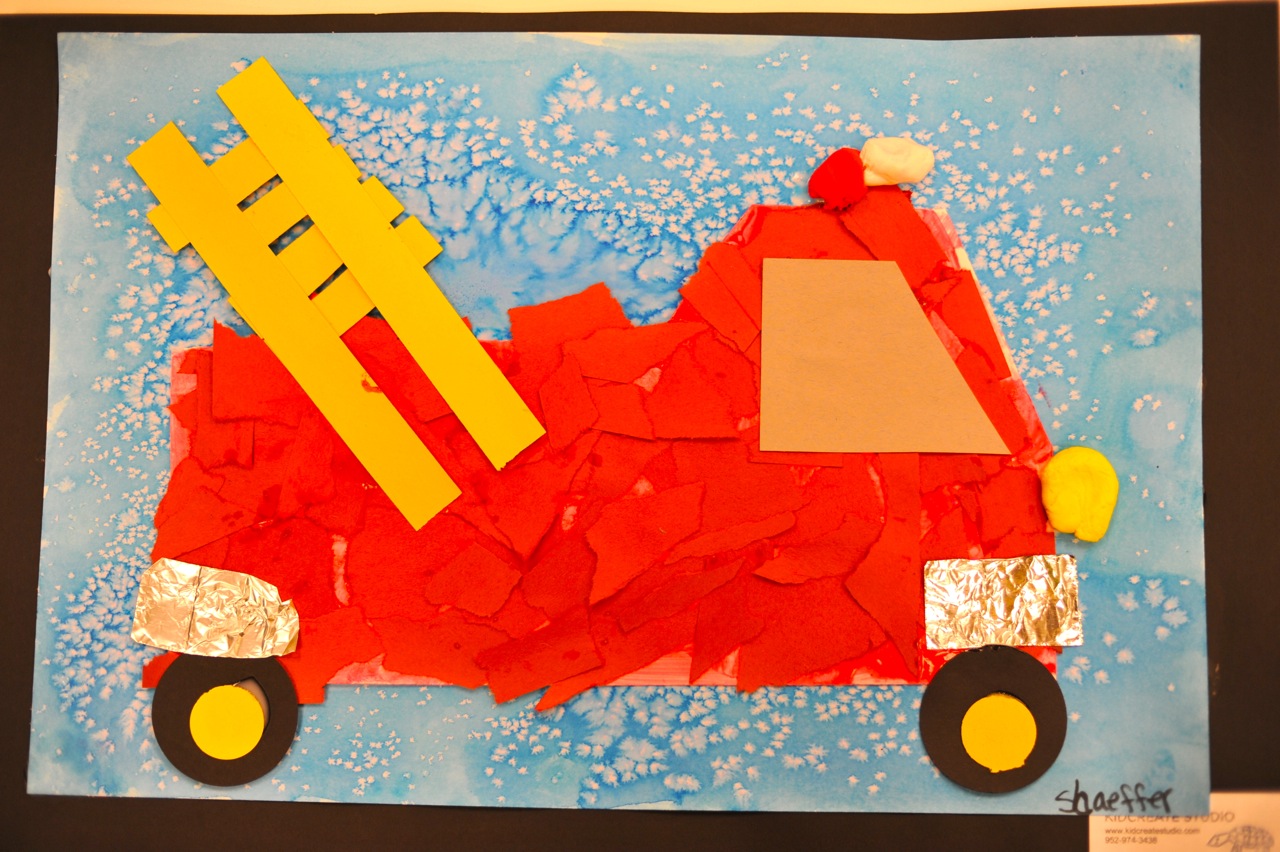
We had the party at Kid Create Studio in Eden Prairie and they helped us make a very cool birthday card and firetruck project…  It was a great place to have a birthday party.  The kids were totally engaged, quiet and so creative….

Here are a couple examples of their finished work…  It was so cute to see how different they all were, I love that they were kid centered and kid created…

In leu of gift bags we sent the kids home with their hats, badges, artwork, a few coloring sheets, and these cookies..  I just made sugar cookies and used a firetruck cookie cutter… I then decorated them to look similar to a fire truck…  This isn’t the best picture, but you get the idea…

Pumpkin Project

22 Oct

PUMPKINS EVERYWHERE

The boys and I got a bit of a later start on decorating for Halloween… Maybe it is because the weather is so nice, maybe because of the impending arrival of baby #3, not sure… Either way, we’ve begun the fun!  Here is one project we tried this year….  It’s super easy and very cute!  The best part of this project, for me, was the fact that I planned it to be a pumpkin project and the next thing I knew they turned them into Jack-O-Lanterns and the boys added random supplies from our art cupboard to decorate them to their liking… Love their creativity!

SUPPLIES:

9.5×11 orange construction paper (you can use bigger paper for bigger pumpkins)

Black, Green, or Brown construction paper for stem (and face if you want)

Glue/Glue Stick

Stapler (or glue again)

DIRECTIONS:

Cut one inch strips out of the orange construction paper.  For my preschoolers I first fan folded the paper and then let them cut along the folded lines.  This seemed to work pretty well for them.  The bigger pumpkins were fan folded the “long” way and the smaller pumpkins the “short” way.

Take the one inch strips and lay them out like a “sun” making sure that the ends of each of the orange pieces are on top of each other.  Glue these ends together.  Pinch them together to make sure they are stuck.  Then curve the other pieces up again so the tops of the paper are overlapping at the top.  I then staple these together so that they are certain to stay together.

To add the stem I just folded one end of the paper and had them glue it to the top. We then added the faces, pom pom balls etc.. with glue!  EASY PEEZY!  Here is a close up of one of the ones my three year old made.  You can see that he did the cutting, glueing etc..  It’s not “perfect” but it is more adorable than perfect in my eyes…

Pumpkin Bread (with or without chocolate chips)

12 Oct

I’ve been fairly into “pumpkin” flavored things the past week… I’m thinking it’s because the canned pumpkin shortage is now over!  Maybe it’s because I am 9 months pregnant… Either way, last week I made the most YUMMY pumpkin bars (thanks to my friend Lynn) and this week I’m going to try pumpkin bread.  My neighbor Melanie said she always puts chocolate chips in her pumpkin bread, which I have never tried, but I think I’ll try it this year.  I mean what more could a pregnant girl craving pumpkin ask for-pumkin and chocolate mixed… MMMMMM!  I know they are a good combination because my mother in law makes a chocolate pumpkin pie……  OK so here is the recipe I’m trying:

Ingredients

  • 3 cups white sugar
  • 1 (15 ounce) can pumpkin puree
  • 1 cup vegetable oil
  • 2/3 cup water
  • 4 eggs
  • 3 1/2 cups all-purpose flour
  • 1 tablespoon ground cinnamon
  • 1 tablespoon ground nutmeg
  • 2 teaspoons baking soda
  • 1 1/2 teaspoons salt
  • 1 cup miniature semisweet chocolate chips (optional)

Directions

  1. Preheat oven to 350 degrees F (175 degrees C). Grease and flour two loaf pans.
  2. In a large bowl, combine sugar, pumpkin, oil, water, and eggs. Beat until smooth. Blend in flour, cinnamon, nutmeg, baking soda, and salt. Fold in chocolate chips and nuts. Fill pans 1/2 to 3/4 full.
  3. Bake for 1 hour, or until an inserted knife comes out clean. Cool on wire racks before removing from pans.
Design a site like this with WordPress.com
Get started