Mommyapolis had a couple ideas published in an online ebook called, Classroom Party Guide, Fun Ideas for the Whole Year! The book is exactly that, fun ideas for special occasions. There is an idea or two for each month of the school year and Mommyapolis is featured in December! I feel very honored to be included in this book! I think this book is a fantastic resource for mommy’s, teachers, room parents, and classroom volunteers. If you’d like to check it out, click here : http://www.volunteerspot.com/ebooks/ClassParty Thank you Amy from Teach Mama for suggesting us for this book!
Adorable Back to School Ideas, NOT FROM ME….
17 AugAs I spend my nap time today checking out some blogs, I am just shocked at the amount of AMAZINGLY talented people out there… I mean amazing… One blog that I stumbled upon today (via Oopsey Daisy) is called Brown Paper Packages… She has some WAY CUTE things for Back to School. Here are some examples… I’m hoping to do one or two of these with my boys for their teachers. I’ll let you know how they turn out…
Please check out her site, it’s adorable! I mean really adorable!
The Icky Sticky Frog
10 AugWhat can I say, I’m a sucker for Frogs… Even our nursery is “frog” themed… I love them, well kind of… I love pretend frogs :)… But being the mommy of boys I think I better learn to love the real kind too… Lately we’ve seen a ton of little frogs and toads out and about in our lawn! The other night we were sitting on a friend’s deck around 10:00pm and all of a sudden my husband screamed and flailed and jumped and squirmed all at the same time. Come to find out a frog had jumped on his shoulder… It must have been on the table umbrella, roof or tree in order to land where it did, but it did provide us with a few giggles on Ben’s behalf!
I figured that since we’ve seen so many frogs around and about we might as well do a frog project! We’ve had this book for some time and really love it… It’s simple, sweet and a little bit silly! I think you’ll enjoy it too… I noticed it’s priced under $5.00 at Amazon if you are interested! It’s called The Icky Sticky Frog, by Dawn Bently The book features a frog with googly eyes and a long sticky tongue that stretches out from the cover… There is a cute little surprise ending that your kiddos are certain to love!
I also found the book on the Moving Picture Books website for $0.99 if you want to download it and watch it that way… Either way, it’s adorable!
You don’t have to have the book to enjoy this craft, however… There are a couple variations so choose what is best for your family…
Here’s what you’ll need…
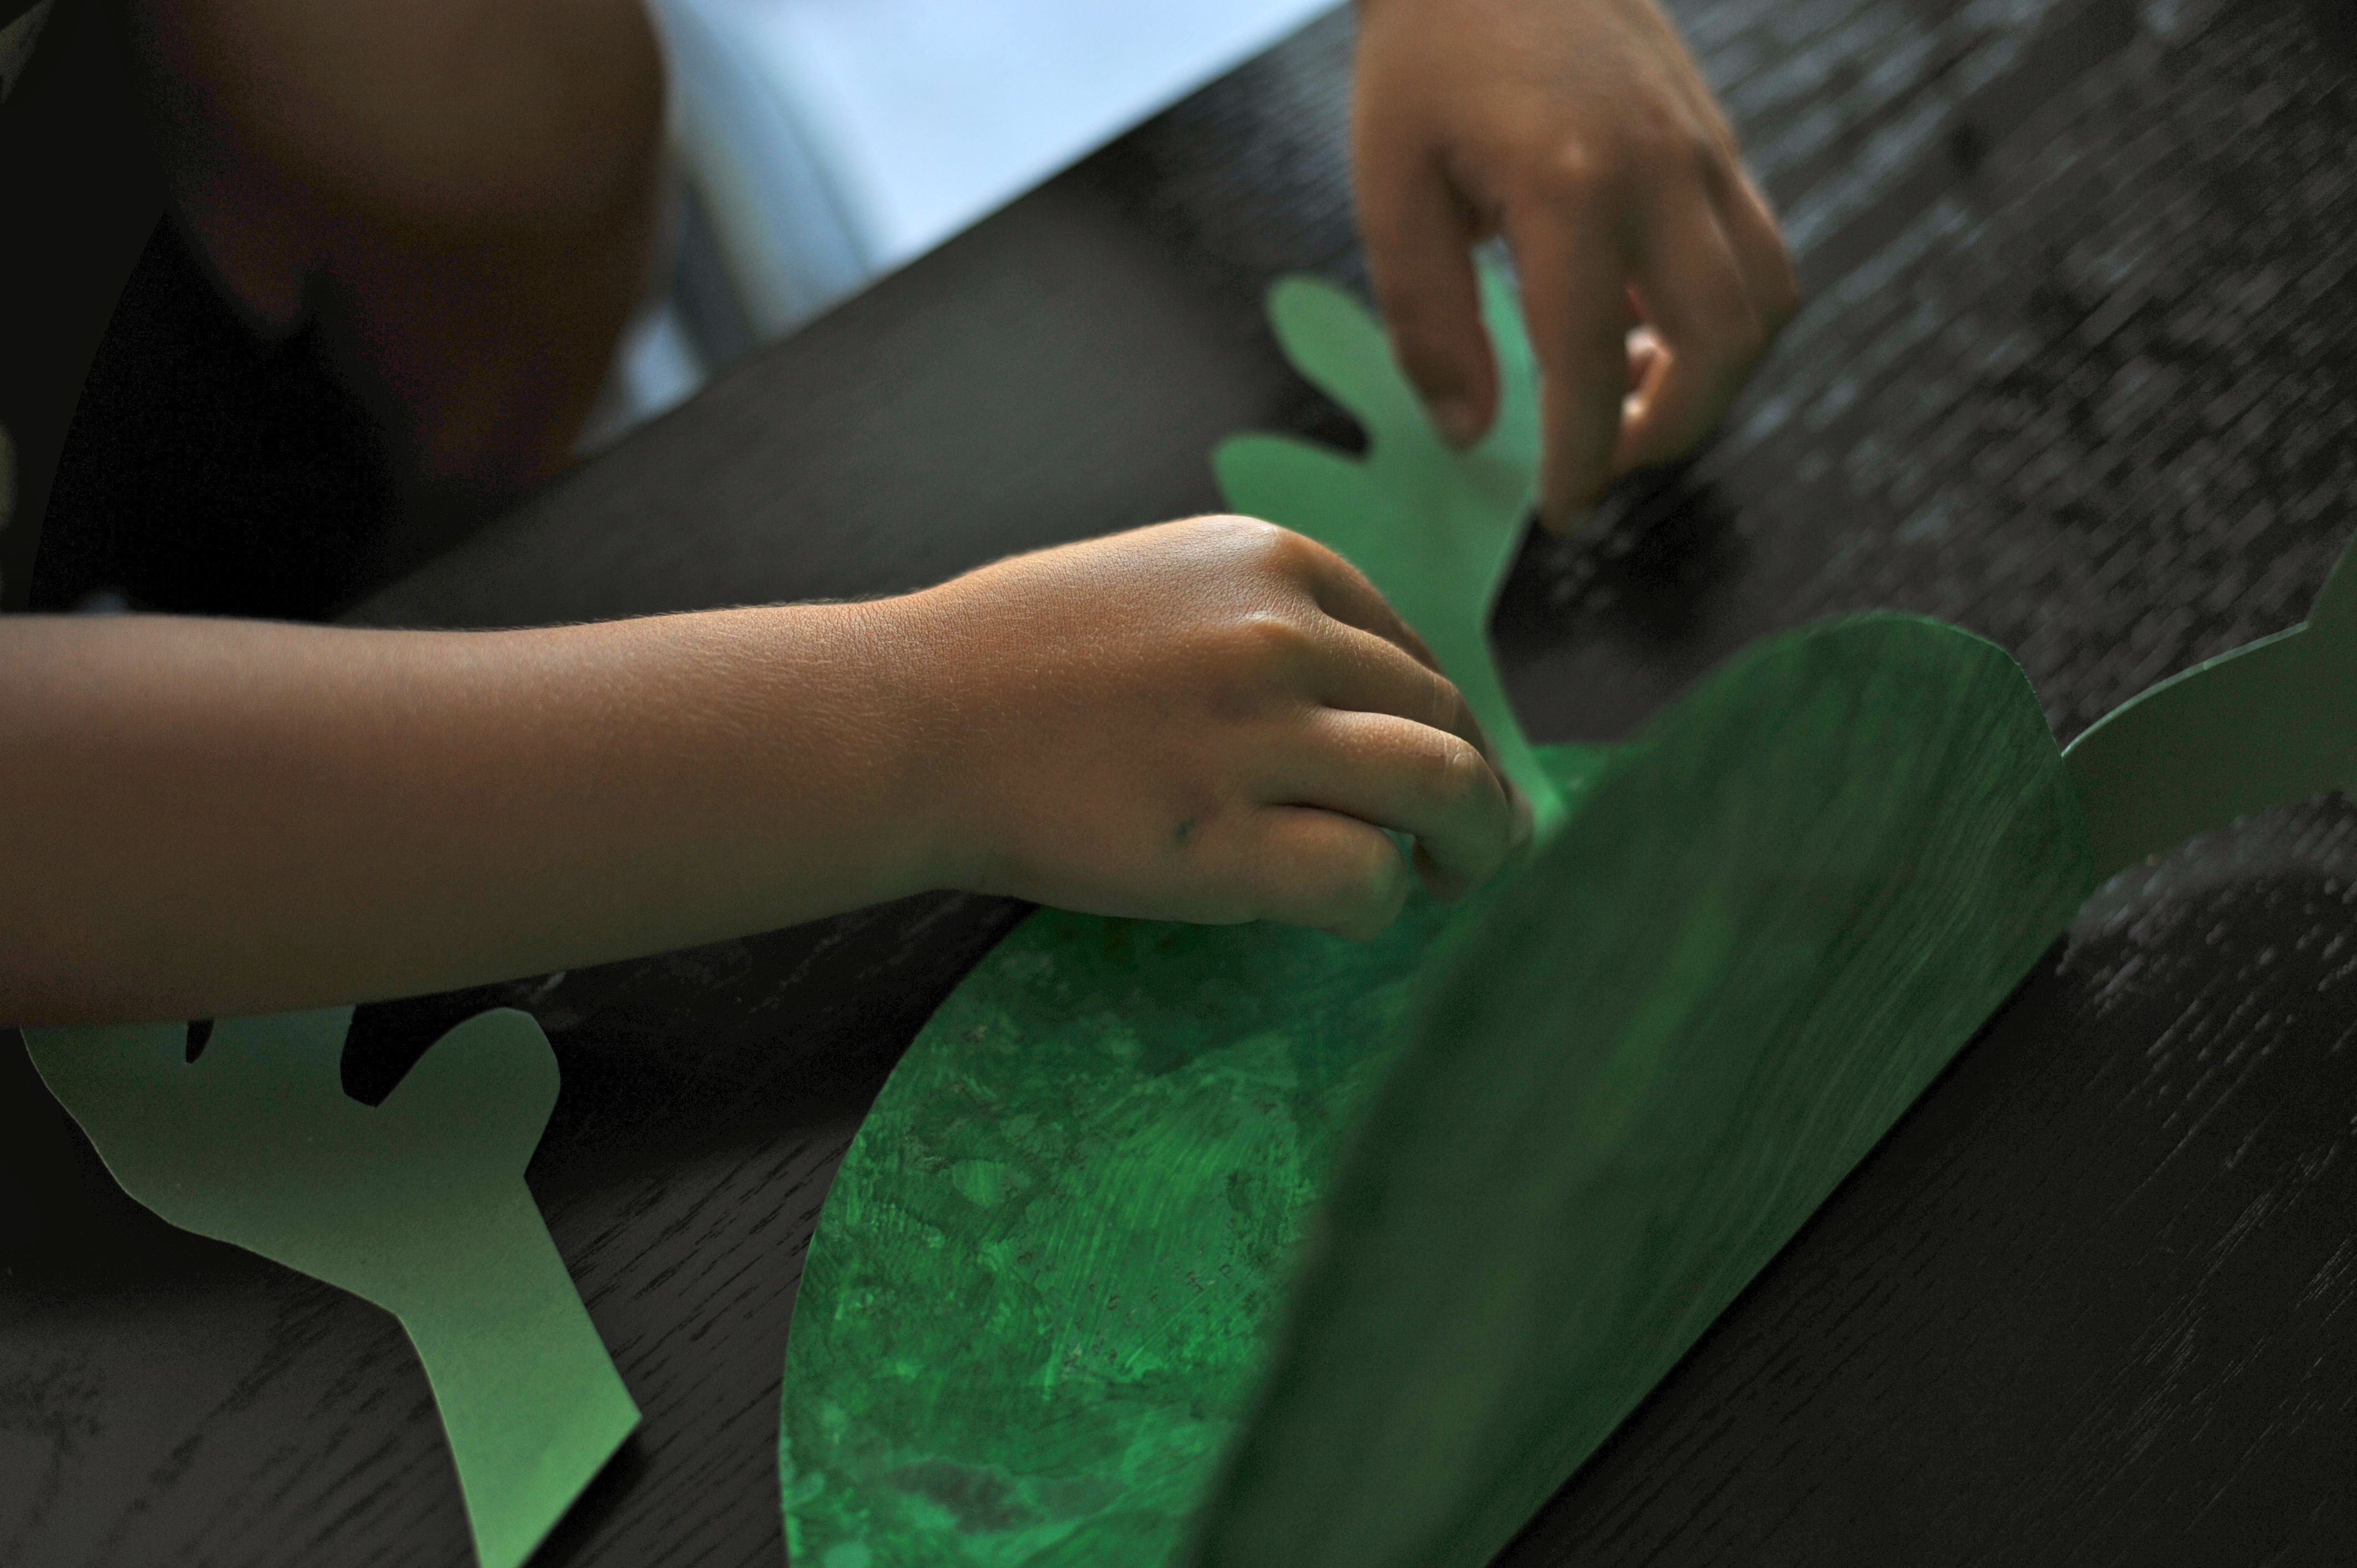
Green Construction Paper for the hands, feet, and eyes
Paper Plate (you can either use a green paper plate or paint the plate green) for the body
Red Construction Paper or party horn for the tongue
Googly Eyes or white paper for the eyes
Glue
DIRECTIONS:
1. Paint both sides of the paper plate…
2. Cut out some hands, feet and eyes (if desired) from the green construction paper
3. Once both sides of the plate have dried, fold the plate in half….
4. Glue on the hands and feet and eyes (either google right to the top of the paper plate or eye buds)
5. Cut a strip of red paper and roll it around your finger or a pencil to make it “curl”
6. Glue the tongue to the inside of the plate…
7. TADA your frog is complete… My boys were running all around the house trying to “snap” bugs up with their tongues. I think maybe we should make some bugs for them to eat!
***** You could even research frog facts and write them on a small piece of paper and put them inside your frogs…
RIBIT RIBIT RIBIT…
Cloth Diapering
4 AugDo any of you use cloth diapers? We used cloth with our older two boys for a couple months and then I went back to work. With S Brother #3 we’ve done a much better job using them and we actually like it… I think I’ve even converted my husband over to cloth… Needless to say I think that using cloth diapers is a big step and if it were not for my good friend Jen I probably wouldn’t be so “pro” diapering. She taught me how to wash, get out stains, dry and keep my diapers… I think having her support really has helped me learn and grow more comfortable with cloth… We have even started using cloth swim diapers! So I’m wondering if any of you use cloth??? If you do use cloth, what kind do you use? We are currently using Gro Via, Fuzzibunz, and Charlie Banana… I have friends who love Bum Genius, Thirsties, and Kissaluvs. What do you wash with? We use Bio-Clean to get out stains and we use Rockin’ Green and Country Save detergent. We never use bleach, never use dish detergent, dry them in the sun or in the dryer and wash them every other day… We use disposable liners (sometimes) and I still put him to bed in a disposable diaper (just incase)… We have not had any issues with leaking (we did have leaking issues with my first born, but we were using Dreft and I’m sure that is why). Really they are great… If you are considering cloth and you have more questions I’d be happy to answer them… They have saved us some money and we feel we’re helping the environment a bit too… Let me know your thoughts…..
Check out Mommyapolis on Oopsey Daisy….
2 AugThe boys (Ben helped too) and I made a fun little back to school project for a fellow mommy blogger… You can see the post on Oopsey Daisy’s Blog…… Here is the link…. http://www.oopseydaisyblog.com/2011/08/apple-lollipops-mommyapolis.html
A Hidden Gem…
1 Aug

Our family values time together more than anything. Both Ben and I must have “time spent” in our top five Love Languages… One way that we try to exercise our time spent is by taking summer vacations. This summer we decided to take a ROAD TRIP to Michigan. Ben was shooting a wedding in a tiny little town called Northport and the boys and I decided to tag along. Our final destination was about 13 hours from home (this traveling with a 5,4 and 8 month old) and really it was not that bad at all… We piled everyone in the MINI VAN and off we went. We made our trip out here up through the UP of Michigan, which was amazingly beautiful… We drove about 6.5 hours to a little town that just happened to have a hotel with a water park (of course this was planned). We arrived safely in our resting spot of Traverse City the next afternoon and have been enjoying Lake Michigan ever since. This area really is a hidden gem. The water looks like you are deep in the caribbean and the little towns are adorable. We’ve ventured to several beaches, parks, and restaurants. We’ve had our share of homemade ice cream, fudge, and pizza (all things I love to get “local” while on vacation). Whether you venture an hour away or 13 hours from home, time spent is a wonderful way to create memories and strengthen your family bond… We are going to have some great pictures to put in our summer memory books when we get home!
PS… This is at the Sleeping Bear Sand Dunes…. A workout on the way up and a tumble of a time on the way down! FUN FUN FUN…..
Homemade Popsicles….
19 Jul
I’m not sure about you, but we are being blanketed by some extreme heat this week. Yesterday the heat index was well over 100′ and I actually heard the weatherman say that our humidity resembles that of the Amazon… WOW… Needless to say we are going through popsicles like they are water! I actually think if I made ice with a stick and called them “watersicles” my boys would eat them right up! We made super easy popsicles today. I simply sliced up some of our favorite fruit and put it in our molds along with some pink lemonade… I figured we could make these somewhat healthy! If you don’t have popsicle molds paper cups work just fine, they are also super easy to tear off the cold treat when you are ready to eat it! I’ve also seen people use cute little shaped cups or molds to make their popsicles in. Do any of you have one of those new fancy Zoku popsicle makers? We don’t have one yet, but a friend does and really says it’s great, what are your thoughts? Here are a couple other recipes I have gathered over the years…. Stay cool!
Fresh Strawberry Popsicles
Ingredients
- 2 cups strawberries hulled and puréed
- 1 cup sugar
- 1 1/4 cups water
Directions
In a saucepan, mix the sugar and water and cook over low heat until the sugar has dissolved. Allow to cool.
To make the popsicles: Stir together the puréed strawberry and 1 cup sugar syrup then pour into popsicle molds and freeze.
Banana Blueberry Popsicles
Ingredients
- 3 to 4 ripe bananas (1 pound)
- 1 1/2 cups yogurt
- 3 tablespoons sugar
- Juice of 1/2 lemon
- 1 cup fresh blueberries
Directions
- In the bowl of a food processor, puree bananas until smooth. Add yogurt, sugar, and lemon juice; pulse to combine. Remove half of the yogurt mixture; set aside.
- Add blueberries to processor, and pulse until just combined. Layer blueberry and reserved yogurt mixtures into ten 1/3 cup popsicle molds or paper cups. Using a spoon or popsicle stick, swirl the two flavors together. Insert popsicle sticks. Transfer to freezer until frozen, about 8 hours
- Dip the popsicle molds quickly in hot water to release or peal away the paper cups.
Chocolate Yogurt Cups
Ingredients
- 1 1 (8 ounce) containers plain nonfat yogurt
- ¼ cup cocoa
- ¼ cup Sugar
- 4 4 popsicle sticks
Directions
1. Mix all ingredients in a small mixing bowl. Spoon mixture into four, 3 ounce paper cups. Set cups in a muffin pan or on a flat plate. Place popsicle sticks in the center. Freeze about 3 hours or until solid.
2. Peel paper cups away from popsicles before serving.
Root Beer Float Pops
Ingredients
4 cups Root Beer
2 1/2 cups Vanilla Ice Cream
DIRECTIONS
Open the root beer and place it in the fridge for 5-20 minutes to “flatten” it a little bit. Pour the cold root beer into a pitcher and put it in the freezer for 10 minutes more. (This will make it very very cold so the ice cream doesn’t melt as much).
Fill each of your popsicle molds HALF full of root beer
Gently lower a small scoop of ice cream into each popsicle mold so it is about three quarters full.
Slowly add more root beer until the molds are ALMOST full. Make sure to leave some space at the top of the mold for “expansion”.
Scoop off the foam with a spoon. Freeze for at least 6 hours.
Remove from the freezer; run under warm water so you can easily remove the popsicles from the mold.
Fresh Strawberry Pie or Itty Bitty’s…
15 JulStrawberry pie is one of our favorite summer desserts. It’s so fresh and easy that we find ourselves bringing it to BBQ’s and dinner parties over and over again! Yesterday we were making a meal for some friends that recently had a baby. I decided we’d try making “mini” strawberry pies just to spice it up a little bit. One thing about me and “mini”, we don’t mix well. For some reason every mini thing, aside from cupcakes, that I’ve tried to make has not turned out so well. I figured I’d try these, but I didn’t have huge expectations knowing my history! To my surprise they turned out! AND…. I got to use my adorable itty bitty pie tins, YEAH! We ALWAYS eat our strawberry pie with homemade whipping cream-much more than a dollop, but you could try yours plain, with ice cream, or even with whipped topping….. Little Shaeffer told me this morning his favorite part of strawberry pie is THE WHIP CREAM, so I guess that tells you how we feel about it in our house! Here’s the recipe we use…. If you and I are going to the same BBQ and we are both assigned “dessert” let’s call each other and make sure we make enough pie for everyone!
Pastry:
| 1 | cup all-purpose flour |
| 1/2 | teaspoon salt |
| 1/3 | cup plus 1 tablespoon shortening |
| 2 | to 3 tablespoons cold water |
Filling:
- 1 1/2 quarts fresh strawberries cut in half (or smaller if making itty bitty’s)
- 1 cup white sugar
- 2 tablespoons cornstarch
- 1 cup boiling water
- 1 (3 ounce) package strawberry flavored gelatin (I often times use sugar free since you’re adding sugar any ways)
DIRECTIONS
In medium bowl, mix flour and salt. Cut in shortening, until particles are size of small peas. Sprinkle with cold water, 1 tablespoon at a time, tossing with fork until all flour is moistened and pastry almost cleans side of bowl (1 to 2 teaspoons more water can be added if necessary). I use my food processor to make the dough and it works perfectly. Gather pastry into a ball. Shape into flattened round on lightly floured surface. Wrap in plastic wrap; refrigerate about 45 minutes or until dough is firm and cold, yet pliable. This allows the shortening to become slightly firm, which helps make the baked pastry more flaky. If refrigerated longer, let pastry soften slightly before rolling. Heat oven to 425°F. With floured rolling pin, roll pastry into round 2 inches larger than upside-down 9-inch glass pie plate. If you are making mini pies use your pie tin as a “cookie cutter” and trace around the edge of the tin. I then rolled my rounds out a little more so they were slightly bigger than the mini tins. Fold pastry into fourths; place in pie plate. Unfold and ease into plate, pressing firmly against bottom and side. Trim overhanging edge of pastry 1 inch from rim of pie plate. Fold and roll pastry under, even with plate; flute as desired. Prick bottom and side of pastry thoroughly with fork OR place a coffee filter inside the un-pricked crust and fill the filter with rice making sure to push it against the edges. Bake 8 to 10 minutes or until light brown. Cool on cooling rack. I opt for the “rice” version so that my filling doesn’t leak through the pricked holes and make my crust mushy….
In a saucepan, mix together the sugar and corn starch; make sure to blend corn starch in completely. Add boiling water, and cook over medium heat until mixture thickens. Remove from heat. Add gelatin mix, and stir until smooth. Let mixture cool to room temperature. Place strawberries in baked pie shells; position berries with points facing up. Pour cooled gel mixture over strawberries. Refrigerate until set. Serve with whipped cream, if desired.
Literacy in the Car….
11 Jul
We keep one of these magazine files/bankers boxes in our car. It sits right between the boys car seats. It is stuffed with books, all sorts of books. Fiction, non fiction, easy readers, you name it! It also has two little white boards, two markers and two erasers floating around in the bottom of it. Any time we are in the car the boys immediately pull out a book or a board. They “read” the easier books and make up stories to go with the harder books. They tell me facts about sea turtles, tigers, and butterflies…. The even “hide” books from each other for the next trip, hilarious. We also keep two white boards in the box. The rule with the white boards is that they are used for “words” or “numbers” not pictures. They can write any words they want. Sometimes I give them “spelling tests” or we write all the words we can think of in the “at” family (or other word families). Sometimes they write the names of their friends, family members, and pets. We even find ourselves doing math facts and numbers. Often times they just write the words for things they see. Just yesterday I got them unbuckled and notices the words “PT CRZR” on one of the boards… Can you guess what my 4 year old saw on his journey home? Just a quick and easy way to promote literacy OR EVEN MATH SKILLS on your ventures out and about!
Handprint Strawberry
10 JulThis time of year in Minnesota is awesome! The weather is warm, the sun is bright, and the strawberries are in full bloom (a little later than normal this year). The boys (and mom and dad too) have been indulging in fresh strawberries for about a week now, YUMMY… Today we are even making a fresh strawberry pie-mmmmmm! What better time to do a strawberry craft! This one is pretty simple and cute as a button!
YOU’LL NEED:
Red tempera paint
Green tempera paint or a green marker
White paper
Black “Sharpie” marker
DIRECTIONS
Paint your child’s hand, or let them paint their own, red. Have them keep their fingers together and stamp it on the paper with the fingers pointed down. Wash the messy fingers! Once the hand print is dry you can have your child draw the stem and seeds with the green paint and black marker… Fun, easy and adorable!


