Pumpkin Pie Play Dough

15 Nov


In the spirit of the season, the boys and I made “Pumpkin Pie Play Dough” this afternoon… It smells and looks like pumpkin pie, but it’s play dough… I highly suggest making it, it was so much fun! The recipe is below, originally from Family Fun Magazine…
Pumpkin Pie Play Dough

1 cup flour

1/2 cup salt

2 teaspoons cream of tarter

2 teaspoons pumpkin pie spice

1/2 teaspoon cinnamon

1 tablespoon veg oil

1 cup water

6 drops red food coloring

15 drops of yellow food coloring

Combine dry ingredients in a non-stick pan

Add oil, water, food coloring and whisk until smooth

Cook over medium heat, stirring constantly, until it forms a ball

Turn onto counter, let cool slightly, knead until smooth

Make a Turkey with Leaves! Quick before it snows :)

7 Nov

This is a project the boys and I did last year right before we moved.  A friend of mine from MOPS found this project in the MOMMYAPOLIS archives and she told me she made these as Thanksgiving cards for their relatives- super cute idea!  What ever you decide to do, I think you should make these before it snows so that you can use the leaves that are scattered all around your yard!

Here is the process…

My Dishwasher Secret

3 Nov

When we moved to Colorado we had this awful problem with our dishes.  Every time I took them out of the dishwasher they had this weird white film on them…  It was ruining my dishes.  Our home here has much harder water than we did in Minnesota so I attribute this oddness to the water.  We also don’t have a water softener here, which we did in Minnesota, so that could be part of it too.   I researched all sorts of remedies including adding bleach to the cycle, lemishine, vinegar alone, etc..  I tried different kinds of detergent, turning on the hot water in the sink before running the dishes and even only running it in the morning.  NOTHING worked…  I then decided to combine a few of the remedies and TADA it worked.  So here is my “SECRET” dishwasher recipe.  I actually wish I would have discovered this in Minnesota because I think it might have saved my glasses from that awful etching..

OK it’s not that tricky!

1.  Put your favorite dishwasher detergent in the CLOSED portion of the door only.  DO NOT put it in the open part…

2.  In the open part of the dishwasher slot, put a Tablespoon of baking soda…

3.  In the base of your dishwasher, yes the tub part, under the bottom rack poor some vinegar.  I probably use about a cup a cycle, maybe a little less.

4.  I do still use a drying agent (like jet dry) but that really is up to you…

Run your cycle as normal.  I promise you will have sparkly clean dishes…

Halloween Spider Project

29 Oct

We are making these in my son’s class for the Halloween party…  I think they are so easy, so cute, and so fun!  If you’re looking for something last minute, this is for you!

YOU’LL NEED:

construction paper for background (any “halloween” color, I chose purple, but I’ve also done this with orange paper)

black construction paper for spider

tempera paint in coordinating halloween color ( I chose orange, but purple would be fun on orange paper)

marble

google eyes

lid to a box or tub

DIRECTIONS:  Remember, kids can do most of these steps on their own, it makes their projects very adorable.  Sutton and Shaeffer did most of this work themselves (I obviously prepped the paint and supplies), but they folded, glued, rolled, painted etc.. on their own!

Squeeze a small amount of paint into a small bowl or cup

Put the marble in the paint and roll it around until it is covered

Put the construction paper in the box lid

Place the marble in the box (on top of the construction paper) and let your child roll the marble around making a ‘web’ like design

You may need to re dip the marble a couple of times to get the desired web design

Set your picture aside to dry

Trace something circular on black construction paper for the spider’s body, I used a jar of salsa 🙂 that was out from lunch!

Cut 8 half inch strips of black paper for the legs

Accordion fold/fan fold the strips of black paper so the legs are wiggly

Glue the legs onto the body of the spider

Glue the entire body and legs onto the web you painted earlier.

Add the google eyes

TADA….

Happy Halloween

27 Oct


A Monster Themed “Almost” Sleepover…

21 Oct

OK OK I think this might qualify for a double themed party, but it’s just how it worked out..  Sutton really wanted to have a sleepover this year, but there were several reasons I was against this…  #1- I think he’s too young. #2- Most of his friends are girls.  #3-I am not sure it would actually “work”.  #4- I am a little selfish with my own sleep.  #5- No need to start something I may never be able to stop :).  Instead of having the sleepover, we had an “almost” sleepover.  Basically this meant we invited the kids to wear their PJ’s and bring their sleeping bags.  We made “breakfast” for dinner -as if we had just woken up from a “TERRIFIC” night of rest, and of course we watched a little movie.  Here is how the evening unfolded…

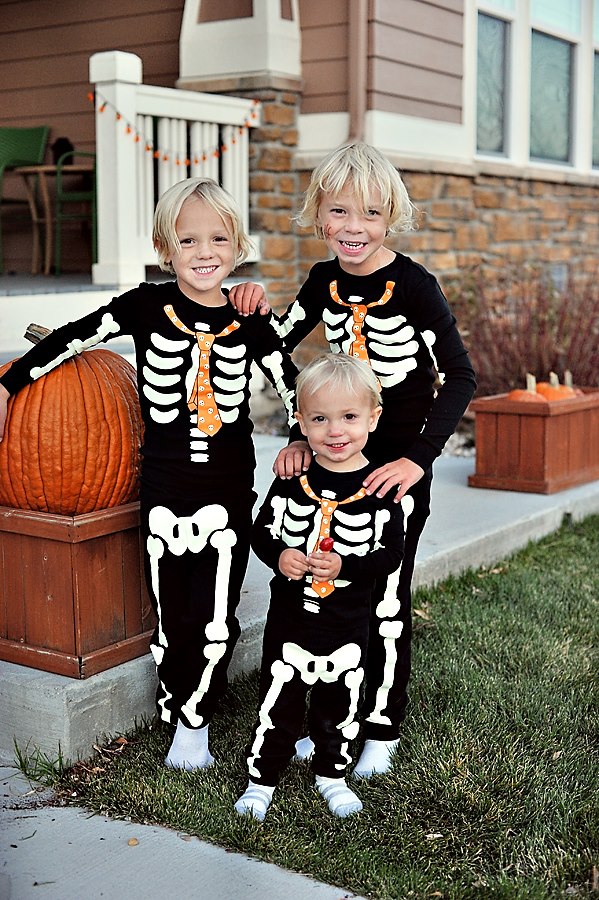
5:30:  Our 12 Guests arrived all cozy in their PJ’s.  We played with some MONSTER beach balls (they just had monster faces on them) in the front yard while we waited for everyone to arrive.

**  I then split the guests up into 3 groups of 4 kiddos.  I had set up three little craft stations to go with our themes.  Each group of four worked at their station for about 10 minutes prior to switching to the next station..  I didn’t actually time how long they were at the stations, but rather just watched to see how they were doing…  It kept the party moving and the kids were super engaged.  I didn’t have any crazy running around, broken lamps or limbs…  It really was pretty calm…  Here are our stations:

PILLOWCASE DECORATING:  I used my silhouette machine to cut out each of our guest’s names in heat transfer paper and then ironed the names onto blank white pillowcases.  The kids used fabric markers to decorate their pillowcases at this station!  I think that we could have spent our entire party time decorating pillowcases.  Our guests might be wanting to finish these at home!

GLOW IN THE DARK MONSTER PAINTINGS:  I used a sharpie marker before party time to draw out some quick monsters.  I tried to make all 12 of them different, but there is only so much you can do…  I purchased some glow in the dark paints at Michaels and let the artists do their work from there!  They were pretty funny about choosing their monsters as well as about choosing the colors for their monsters.  I wonder if any of them hung them in their rooms to see if they would actually glow!

When they were done with their paintings I hung them on the wall under these little individualized monster bulletin board pieces I found…  Our house looked pretty cute after all 12 monsters were hanging on the walls…

DOODLY MONSTERS:  The last station was not super creative, but they loved it.  I printed out some doodle monsters for them to color using smelly markers…  They had lots of fun sniffing and coloring- our house smelled very fruity after this activity :).

The friends worked up quite an appetite after all these projects…  My handsome hubby “Chef Ben” whipped up some homemade pancakes with whip cream & syrup, sausage, and watermelon for our young guests…  There could not have been an empty tummy in the house- they were all so quiet while eating!

Of Course then it was movie time…

…and then cake and cake pops… I had never even attempted cake pops before and I’m really not sure I’ll attempt them again :).  My neighbor back in Minnesota was a cake pop artist and I am even more in awe of this now that I’ve tried them myself….  Either way, the kiddos thought they were great and that’s all that matters!

I know Sutton had an awesome time at his party and it was really fun for Ben and I to get to know some of his school friends a little better!  Thank you to all of you who came, it was a MONSTROUS good time!

Halloween Pumpkin Craft

17 Oct


BDP_3373

This is one of my favorite Halloween crafts.  I’ve done it for years with all ages of kids.  You know your little ones the best- let them do as much as they can on their own and help them where needed!  ENJOY!


STEP 1:  Cut a pumpkin out of orange paper;  I traced a bowl to get a more accurate circle, but pumpkins are rarely accurate so free handing it is just fine!

BDP_3367

Step 2:  Draw two zig-zag lines down the pumpkin.  Again, older children can do this themselves, little ones might need help with the cutting!

BDP_3368

Step 3:  Cut along the Zig Zag Lines and glue your “puzzle pumpkin” to a black piece of paper…  We used a glue stick as it’s much less messy!  

BDP_3370

4.  Cut out the faces (independently or with help from an adult).  

BDP_3373BDP_3371BDP_3375

Step 5:  TADA

Skeleton Project w/ Q-Tips

9 Oct

Last night I met with the two other room mothers for my son’s Kindergarten class.  I love that this school has “room mother’s”.  We were trying to decide on some fun but easy crafts to do at the class Halloween party… This was one of the ones we decided on and I’m so glad.  I think they are just adorable and so so so easy (and cheap) to make.  Perfect for a group of little spooky’s.

To make:
1. Cut out a skeleton head and draw a face!
2. Glue the head to a black piece of paper and then let your child use the glue to stick on the q-tips. We tried two different methods and both worked fine. We put the glue directly on the paper and stuck the q-tip to it and then we also put the glue directly on the q-tip. Both methods worked well!
3. For the phalanges break the q-tips in half. It’s easier to bend them then to cut them!
4. VIOLA!

The Gift of Time….

3 Oct

There are times in almost every day when I wish time would speed up just a little.   Sometimes it’s because I can’t wait to pick the boys up from school, sometimes it’s because I want Ben to get home from work, sometimes I can’t wait for play time, and there are even times when I can’t wait for bedtime.  When you are about to lose someone very close to you, all you want to do is stop time, turn back time, or be granted MORE time…  This is how I feel tonight, I just want the gift of time.  The woman who I have always considered my second mom is dying of Kidney Cancer.  Barb helped raise me from birth to today.  She has been my Mom’s best friend since before I was born- 40 years of friendship.  They have gone through every facet of life together… Birth, marriage, divorce, faith, loss, happiness, sorrow, sickness and health.  I have lived with Barb, she has witnessed all my trials and my successes from skinned knees and strep throat to graduation, marriage and births.  She has taught me to  laugh, to cry, to be compassionate, and to love.  This is a woman who can make you giggle at the drop of a hat and give you advice that will withstand a lifetime- all while feeding you some delicious home baked meal.    She is part of who I am and always will be.  I wish I could turn back time.  I wish my boys had more days with her.  I wish she was the one teaching them to make crazy cake and pecan pies.   I wish I had recorded her playing footsie with them and smelling their toes. I wish I had more pictures of her with my family.  I wish she and Ben had more time to laugh together.   I wish she wasn’t dying.  I wish this wasn’t real.  I wish I had more time.    TIME-It’s a crazy thing…  I am going to try my hardest to recognize the GIFT OF TIME from this day forward, rather than wishing it to fly.   I am going to remember the special time I was granted with Barb and share those memories with my children.   I am going to cherish the gift that time truly is!

As for my dearest Barbie, I will always remember the special time you gave me, your love for me and all those close to you, and your timeless spirit. I love you with all my heart…  XOXO

Bacon & Corn Soup

3 Oct

I’ve been trying to have the boys help me make dinners.  It seems like if they “help” then they are more apt to try what we are making.  This week we made Sloppy Joe’s, which they loved and then yesterday we made bacon and corn soup.  I was sure they’d love it because it has all the things they LOVE in it.  I was wrong.  Ben and I thought it was awesome, as did little Sanders, but for some reason I can’t get my bigger boys to eat soup.  They just don’t think they like it- no matter what is in it!  I’ve tried noodle soups, vegetable soups, wild rice soups, etc.. no luck.  Today was no different, but I’m not giving up.  Like I said three of the five of us LOVED this soup- Sanders even had seconds!  I adapted this recipe from The Pioneer Woman…  The first difference is that I didn’t use fresh corn, I used frozen!  I also didn’t add adobe peppers like she does, used milk instead of cream, added more bacon, and used less peppers… I also noticed she has a version with cheese, I didn’t use cheese either!   Here is my version, it really was delicious, I’ll totally make it again…

BACON AND CORN SOUP:

  • 5 slices Bacon, Cut Into One Inch Pieces (or Smaller)
  • Half an Onion, Diced
  • 4 cups of frozen corn
  • 1  4-ounce Can Diced Green Chilies
  • 32 ounces, fluid Low Sodium Chicken Broth
  • 1-1/2 cup Half and Half or Milk
  • 1/2 teaspoon Kosher Salt (more To Taste)
  • 3 Tablespoons Corn Meal
  • 1/4 cup Water

Directions

Add bacon pieces to a pot or dutch oven over medium heat. Cook for a about 5 minutes. Throw in diced onion and stir, cooking the onion for 3 to 4 minutes.  Add corn. Stir and cook for one minute. Add canned peppers and cook for about 5 minutes…

Pour in chicken broth and milk. Add salt. Stir and bring to a boil. Reduce heat to low.

Combine cornmeal with water in a separate bowl. Stir to combine, then pour into the soup to thicken. Cover and cook for 15 minutes over low heat.

Design a site like this with WordPress.com
Get started